Your home is your sanctuary, and there’s something incredibly empowering about improving it with your own two hands. Whether you’re a new homeowner, renting your first place, or simply ready to tackle some home improvement projects solo, these three DIY upgrades will give you maximum impact in minimal time.
Each project can be completed in three hours or less, requires basic tools, and will leave you feeling accomplished and proud of your handiwork. Let’s dive in!
Project 1: Install Floating Shelves for Instant Storage and Style
Time Required: 2-3 hours
Difficulty Level: Beginner to Intermediate
Floating shelves are a game-changer for any space. They provide storage, display opportunities, and can make rooms feel larger and more organized.
Materials Needed:
- Floating shelf brackets (2-3 depending on shelf length) – Suggested hardware Matte Black Shelf Brackets (6) or Hidden Floating Shelf Hanger (8)
- Wood shelf (or pre-made floating shelf) – Set of 2 Floating Wood Shelves or White 24″ Floating Wood Shelves
- Wall anchors (toggle bolts for drywall or masonry anchors for brick/concrete) – Heavy Self-Drilling Drywall Anchors or 180 pc Concrete Anchor and Screws
- Screws (usually included with brackets)
- Wood stain or paint (optional)
Tools Required:
- Drill with bits – I’m a fan of the Ryobi cordless tools like this 20V Variable Speed Cordless Drill
- Level (24-32 inch recommended) – 12″ Workpro Magnetic Level
- Stud finder – This simple stud finder has been a favorite in my tool box. Cheap, easy to use, and reliable!
- Pencil
- Measuring tape – Craftsman tools are always reliable!
- Safety glasses – These safety glasses can be used for many DIY projects from weed trimming to using saws and drills.
Step-by-Step Instructions:
- Plan Your Placement: Decide where you want your shelves. Common spots include above desks, in bathrooms, or creating a gallery wall effect in living rooms.
- Find the Studs: Use your stud finder to locate wall studs. Mark them lightly with pencil. If possible, anchor at least one bracket into a stud for maximum support.
- Mark Your Level Line: Using your level, draw a light pencil line where the bottom of your shelf will sit. This ensures everything stays straight.
- Position Your Brackets: Hold the first bracket against the wall on your level line. Mark screw holes with pencil. Repeat for additional brackets, using your level to ensure they’re aligned.
- Drill Pilot Holes: Drill pilot holes for your screws. If hitting a stud, use wood screws. If going into drywall only, use toggle bolts or heavy-duty wall anchors.
- Install Brackets: Secure brackets to the wall with appropriate screws or anchors.
- Mount the Shelf: Slide or attach your shelf to the brackets according to the manufacturer’s instructions.
Pro Tip: Start with one shelf to get comfortable with the process, then add more as desired.

Project 2: Create a Statement Accent Wall with Removable Wallpaper
Time Required: 2-3 hours
Difficulty Level: Beginner
An accent wall can completely transform a room’s personality, and removable wallpaper makes it renter-friendly and mistake-forgiving.
Materials Needed:
- Removable/peel-and-stick wallpaper
- Primer (if needed for better adhesion) – Wallpaper Primer
- Extra wallpaper for mistakes
Tools Required:
- Measuring tape
- Level
- Utility knife or wallpaper cutting tool – I use this cutter regularly for DIY projects!
- Smoothing tool (plastic smoother or credit card)
- Step ladder
- Clean cloth
Step-by-Step Instructions:
- Choose Your Wall: Select the wall you want to accent. Often this is the wall behind a bed, sofa, or the main focal point of the room.
- Measure and Calculate: Measure your wall’s width and height. Calculate how many wallpaper panels you’ll need, adding 10% extra for trimming and mistakes.
- Prep the Surface: Clean the wall thoroughly. Fill any holes with spackling compound and let dry. Some wallpapers adhere better with a coat of primer.
- Plan Your Starting Point: Most wallpapers look best starting from the center of the wall and working outward, or from the most prominent corner.
- Cut Your First Panel: Measure and cut your first panel, adding 2-3 inches extra length for trimming.
- Apply the First Panel: Remove a few inches of backing and position at the top of your wall. Slowly remove more backing while smoothing down the wallpaper with your smoothing tool, working out air bubbles as you go.
- Continue with Additional Panels: Match patterns carefully and overlap slightly, then trim with your utility knife for perfect seams.
- Trim Excess: Use your utility knife to trim excess wallpaper at ceiling and baseboards for a clean finish.
Pro Tip: Work in good lighting and take breaks to step back and assess your progress.
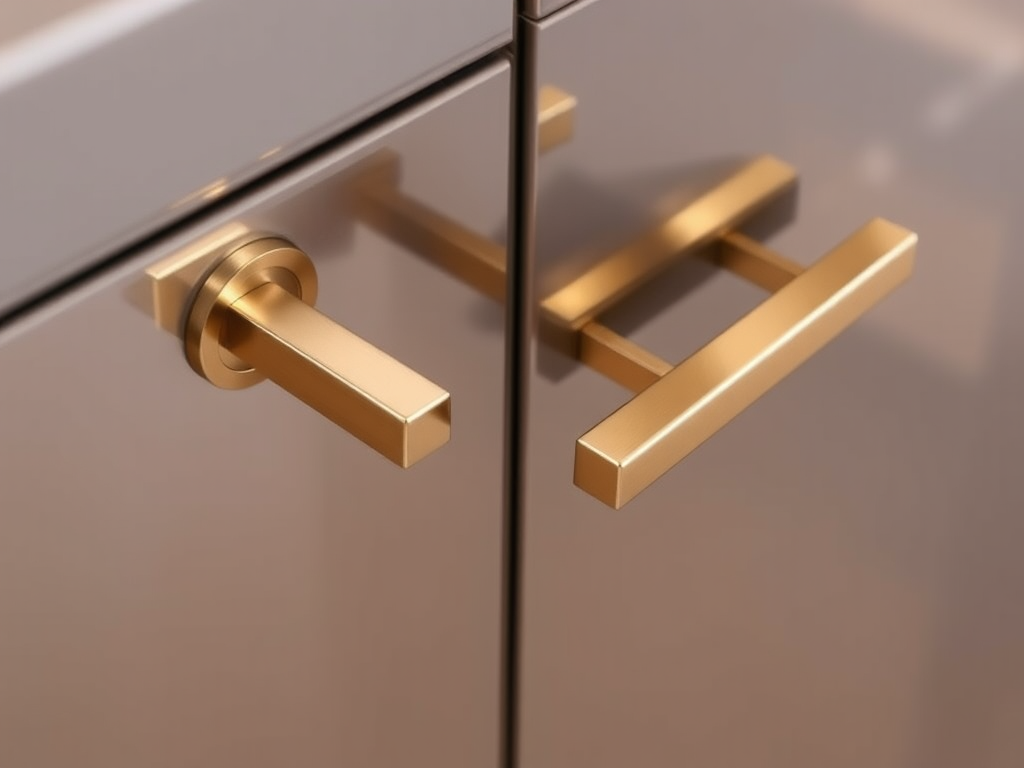
Project 3: Upgrade Cabinet Hardware for an Instant Kitchen/Bathroom Refresh
Time Required: 1-2 hours
Difficulty Level: Beginner
New cabinet hardware is one of the most cost-effective ways to modernize your kitchen or bathroom. It’s like jewelry for your cabinets!
Materials Needed:
- New cabinet knobs and/or pulls – Top Knobs has a massive selection if you’re looking for something specific!
- Wood filler (if changing hardware sizes)
- Screws (often included with new hardware)
Tools Required:
- Drill with bits
- Screwdriver
- Measuring tape
- Level (for pulls)
- Pencil
- Template or jig (optional but helpful)
Step-by-Step Instructions:
- Remove Old Hardware: Unscrew all existing knobs and pulls. Keep one of each style to take shopping as a reference for screw sizes.
- Clean and Assess: Clean cabinet doors and drawer fronts. Check if new hardware will use the same holes or if you need to drill new ones.
- Plan Your Layout: For consistency, measure the placement of existing hardware or plan new placement. Knobs typically go on the upper corner of doors, while pulls are usually centered.
- Create a Template: For multiple cabinets, create a simple template from cardboard to ensure consistent placement.
- Mark New Holes: If drilling new holes, mark them carefully with your pencil. Use your level to ensure pulls will be straight.
- Drill Pilot Holes: Drill pilot holes from the front of cabinet doors/drawers. For pulls, you’ll need two holes per piece.
- Fill Old Holes (if necessary): If your new hardware doesn’t cover old holes, fill them with wood filler, let dry, and sand smooth before painting or staining to match.
- Install New Hardware: Insert screws from the back of doors/drawers and tighten carefully. Don’t over-tighten as this can strip the holes.
Pro Tip: Replace hardware in one area at a time (upper cabinets, then lower, then drawers) to maintain functionality while working.
Final Thoughts
These three projects prove that you don’t need a contractor or a full weekend to make meaningful improvements to your home. Each project builds confidence and skills that you can apply to future DIY endeavors.
Remember, the key to successful DIY projects is preparation, patience, and not being afraid to ask for help when you need it. Most home improvement stores offer advice, give suggestions, and can even cut materials to size for you.
Start with the project that excites you most, take your time, and celebrate your accomplishments. Your home should reflect your personality and style – and there’s nothing more satisfying than knowing you created that transformation yourself.
Happy DIY-ing!

Coping with Loss After Forty: A Guide to Navigating Grief in Midlife
Coping with Loss After Forty: A Guide to Navigating Grief in Midlife Loss after forty carries a unique weight. By this stage of life, we’ve accumulated decades of relationships, memories, and attachments that make grief both more complex and more profound. Whether you’re facing the death of a loved one, the end of a marriage,…
Dating After Forty: Navigating Modern Romance in the Digital Age
Dating After Forty – Navigating Romance in the Digital Age Dating After Forty: Navigating Modern Romance in the Digital Age Dating after forty isn’t a remake of dating in your twenties—it’s an entirely different beast with its own unique challenges, yet some surprising advantages. Whether you’re newly single after a long relationship, divorced, widowed, or…
Building Your Tribe: How Women Can Connect and Grow Their Community in Today’s World
Let’s be real—making friends as an adult woman can feel harder than dating. You know that feeling when you meet someone amazing at a coffee shop or networking event, and you’re thinking, “I want to be friends with her!” but then you both just… never follow up? Yeah, we’ve all been there. The truth is,…


Leave a comment